If you run a Shopify store, letting shoppers add custom text, upload images, or choose extra variant options can turn browsers into buyers. Among the Best Shopify Page Builders, tools that handle product personalization, line item properties, metafields, and custom fields help you sell engraving, monogram, and made-to-order items without confusing the checkout. How do you add those options without breaking your theme or losing customers? How do you create a coming soon page that captures emails and previews custom choices? This article lays out clear, practical steps so you can add personalization options and build a coming soon page with confidence. PagePilot's AI page builder offers ready-made templates and simple controls for adding custom fields, file uploads, and live previews. This helps you follow process best practices for creating a Coming Soon Page on Shopify (Process Best Practices) and reach your sales goals faster.
What is a Coming Soon Page on Shopify?
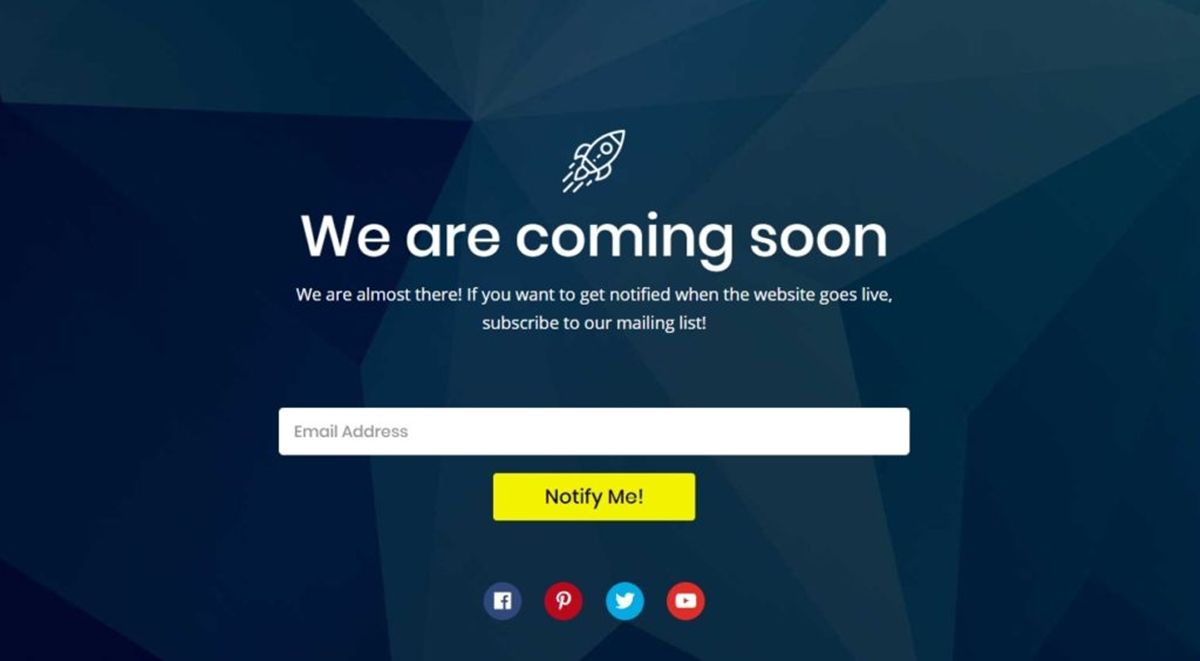
A coming soon page is a landing page designed to build interest and capture leads before a product or store goes live. It tells visitors what is launching, when it will be available, and how they can get first access. Use strong copy, a clear hero image or product demo video, and an email signup form to convert casual visitors into launch prospects. Want to offer early bird discounts or VIP access to drive signups?
Two Flavors of Coming Soon Pages and When to Use Each
The product launch is coming soon, and the pages are live in the store. Visitors can browse the rest of your catalog while the new product teaser lives on a product page or a dedicated landing page. Brand launch coming soon pages lock down the storefront with a password or a single landing page, so the entire site is hidden until launch. The latter focuses all attention on the launch message and signup conversion.
Core Elements That Make a Coming Soon Page Work
Headline that states the promise, short supporting copy that explains the benefit, a clear call to action, such as:
- Email signup or preorder
- Hero media to show the product
- Social proof or early press blurbs
- An optional live chat to answer questions
Add countdown timers, limited quantity counters, or VIP tiers to drive urgency. Use simple forms that ask only for necessary data so conversion stays high.
Psychology That Powers High-Converting Coming Soon Pages
Anticipation raises perceived value and keeps people engaged with your brand. FOMO pushes action when you limit availability or offer launch-only perks. Framing early access as exclusive triggers a more substantial commitment to sign up. Offer a small reward like a discount code to tap into reciprocity. Create a curiosity gap by showing enough to intrigue but not enough to satisfy, prompting people to give you their email to learn more.
How Coming Soon Pages Can Collect Personalization Requests on Shopify
Use the coming soon page to gather personalization preferences before launch. Ask for options such as:
- Custom text
- Monogram placement
- Upload image files
- Size choices
- Color preferences
That input becomes useful for product planning, inventory forecasting, and building personalized preorder offers that feel tailored to the customer. What personalization fields do you need to capture for your product?
Ways to Add Personalization Options on Shopify for Your Launch
- Line item properties: Add simple fields to the product form in your theme to capture custom text or notes that attach to the cart item.
- Variant options: Create variants when personalization can be represented as fixed choices, such as size or material.
- Product options apps: Use apps like Product Personalizer, Infinite Options, Bold Product Options, or Uploadery to add text fields, file uploads, color swatches, conditional logic, and dynamic pricing without heavy code.
- Metafields and custom templates: Store personalization data in product or order metafields and render them on order pages or in fulfillment workflows.
- Cart attributes and draft orders: Use cart attributes to collect preferences early, then convert to a draft order for a manual or bespoke checkout flow if needed.
- APIs and scripts: Use the AJAX API or the Storefront API for advanced UI and Shopify Functions or Scripts on Plus for dynamic pricing and custom discount logic.
Quick Practical Checklist to Implement Personalization for a Coming Soon Launch
- Audit which personalization inputs you need: Text, monogram, image upload, custom engraving, or configuration.
- Choose method: Line item properties for introductory text, variants for fixed choices, app for file uploads, and conditional logic.
- Wire the coming soon form to capture email addresses and personalization intent, allowing you to segment early signups.
- Test how personalization data flows into the cart, checkout, and order notes to ensure fulfillment teams see the info.
- Set pricing rules, SKU mapping, and any extra production lead time in product metadata so that fulfillment and customer service can act accordingly.
- Run a test preorder to confirm the whole flow from signup to custom order creation.
How to Present Personalization Options on the Coming Soon Page So People Sign Up
Lead with the benefit. Show a mockup or template that reflects personalization choices. Use short examples of custom text or uploaded images so visitors see the result. Offer a click to reserve or preorder with a checkbox for personalization interest, or a brief form where customers can type their preferences and upload a sample image. Ask one targeted question to lift conversion rather than a long form.
Fulfillment and Pricing Considerations for Personalized Preorders
Map each personalization choice to the production step and to costs. Decide if personalization requires a surcharge and whether to display it on the coming soon page. Use dynamic pricing tools or apps to automatically add the extra cost. Prepare fulfillment notes and label templates so custom text, uploaded files, and monogram positions reach production without manual retyping.
Testing and Metrics to Watch Before Launch
Track email signup rate, click through to preorder, personalization opt-in rate, upload completion rate, and cart abandonment. Use A/B tests for different calls to action, different incentives like early bird discounts, and different numbers of fields on the personalization form. Monitor time to complete the form; every extra friction point costs conversions.
Questions to Help You Prioritize What to Capture Now
Do you need full specifications now to plan inventory? Can you fulfill custom requests at scale, or will you limit options? Will you charge upfront, take deposits, or collect payment at ship time? Answer these to choose the right combination of line item properties, variants, apps, and checkout flows for your coming soon strategy.
Related Reading
- Does Shopify Host Websites
- Is It Worth Buying a Prebuilt Shopify Store
- How Much Does It Cost to Build a Shopify Website
- Shopify Product Page Customization
- What is Custom Liquid Shopify
- How to Customize a Shopify Website
- Shopify Speed Optimization
How to Create a Coming Soon Page on Shopify

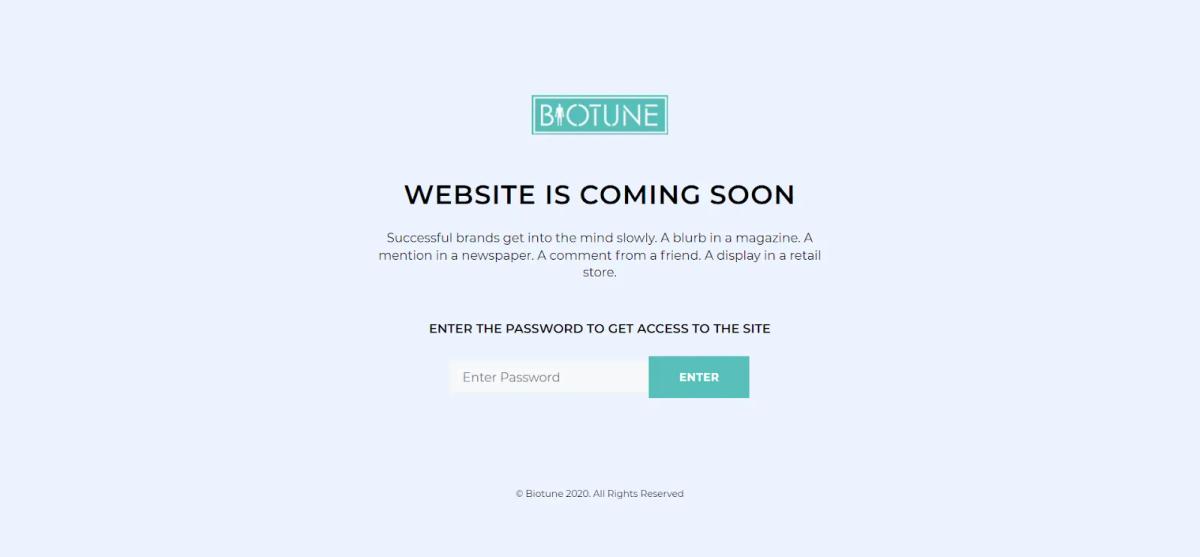
Use Your Password Page as a Fast Coming Soon Landing
Enable the built-in password page when you need a quick coming soon page that blocks public access while you finish setup. In the Shopify admin:
- Click Online Store, then Preferences
- Scroll to Password Protection
- Check Enable Password
- Enter a password and a short message
- Save
Editing the Password Page Layout
Open the Theme Editor, choose the Password page from the page selector at the top, and use the left side blocks to add:
- Image
- Headline
- Email signup block
- Social links
Want more control over text or layout? Go to Online Store > Themes > Actions > Edit Code and open the password.liquid template. Edit the Liquid, HTML, and CSS there if you know code or hire a developer to add custom fields, styles, or third-party widgets.
Customize the Password Template with Line Item Properties and Signup Hooks
Add an email capture form, referral link, or tracking pixels directly in password.liquid so you can build a launch list and measure interest. Add an input form that posts to your email provider or to a Klaviyo signup endpoint. When you add form fields, give inputs clear name attributes and hook them to your ESP or to hidden fields for source tracking. You can also include a basic personalization prompt on the page to gather engraving text, size preferences, or product ideas from early visitors.
Create a Separate Coming Soon Theme Version to Showcase One Page Only
- Duplicate your live theme or install a fresh theme and set it up as a single-page landing site while you build the full store behind the scenes.
- Create a page template called page.comingsoon.liquid or configure the homepage section to show only:
- Hero
- Brief product tease
- Email signup
- Social proof
- Call to action
- Use full-width images or a short video, and place a prominent email input or pre-launch order CTA above the fold.
Want countdown, chat, or advanced timers? Add apps that integrate with the theme through sections instead of editing core templates.
Add Apps and Widgets for More Features Fast
Use apps for countdown timers, live chat, pre-launch waitlist, and advanced signup forms. Popular options include email capture tools, conversion popups, and apps that add sharing and referral rewards. For countdowns and social proof, choose apps that inject a block you can place in the Theme Editor, so you do not edit theme code. If you want analytics on who signed up and which channels convert best, connect UTM tracking on links in the coming soon page.
Add Personalization Options Early so Customers Can Preconfigure Items
Thinking about product personalization? Start collecting preferences before launch. For simple custom text fields, use line item properties added to the product form so the values appear with the order in the cart and in notifications. For more structured personalization, use product variant options or metafields to store templates and choices.
Tools for Advanced Product Customization
Do you need file uploads or conditional logic for multiple options? Use a product customizer app such as Infinite Options or Product Personalizer, which supports:
- File upload
- Conditional visibility
- Extra pricing rules
If you need price adjustments when customers choose add-ons, consider a pricing plugin or Shopify Plus scripts for cart-level adjustments. Hook these personalization inputs to your order notes or to draft orders so your fulfillment team sees the exact instructions.
How to Add Those Personalization Inputs in Practice
Open the product template in Theme Editor and add form inputs with names like properties [Engraving] or properties [Monogram]. Style them with CSS and validate them with simple JavaScript for length and allowed characters. For metafield-driven options, create product metafields in Settings > Custom data, then surface them in Liquid with product.metafields.namespace.key. If you use an app, place the app snippet where the product form lives so it stores values as line item properties or links values to variant SKUs.
Test Personalization Workflows and Fulfillment Flow
Preview the product page, add a configured item to the cart, and review how the personalization data appears in the cart, checkout, notifications, and in the Orders screen. Does the engraving text appear on the packing slip or in the order export that your fulfillment partner reads? If not, map the fields via order templates or use an app that writes custom order notes. Test file uploads end-to-end, so images attach to the order and reach manufacturing without loss of resolution.
SEO, Discovery, and Launch Checklist While You Build
Set the coming soon page to noindex if you do not want it indexed, or allow indexing if you wish to attract early traffic. Add clear social sharing tags and a focused meta description so shares look correct. Keep a launch email sequence ready and connect analytics and conversion tracking to measure signups. Use preview links and password bypass tokens to test on mobile and desktop across browsers.
Scaling A/B Testing with AI PagePilot
Ready to scale your tests with AI? Try PagePilot’s AI page builder to spin up product pages from a competitor or supplier URL and get high-converting layouts fast. Start a free trial and generate three product pages for free today, no credit card needed.
Related Reading
- Hire Someone to Build Shopify Store
- Shopify User Experience
- How to Add Products to Shopify
- How to Design Shopify Website
- How to Create a New Page Template in Shopify
- How to Create a Landing Page on Shopify
- Shopify Mobile Optimization
- How to Add a Review Section on Shopify
8 Best Practices for an Effective Shopify Coming Soon Page

1. Headline That Hooks and Tells Visitors What You Sell
Write a single, benefit-driven headline that tells visitors what your product and brand offer. You have roughly 0.05 seconds to make an impression, so use an explicit promise, a specific benefit, or a short value statement that answers the question visitors silently ask: What’s in it for me? Use wording that reflects product personalization when applicable.
Optimizing Headlines for Custom Products
For example: Reserve your custom leather wallet, or preorder a personalized print with your name. Keep the language concrete and avoid jargon so the headline reads well in search snippets and on social shares. Want to test which phrasing converts best? A/B test two headlines and swap in keywords tied to product customization and custom product options to see which pulls more clicks.
2. Keep Copy Tight, Scannable, and Focused on Emotion Plus Value
Visitors skim. Use short paragraphs, 2 to 3 sentence bullets, and a bold line that repeats the headline benefit. State what’s coming, the launch date, and one or two reasons to sign up now:
- Scarcity
- Early access
- A discount
Marketing for Customized Product Conversion
Since about 95 percent of purchase decisions happen below conscious awareness, nudge people with sensory and emotional cues: show how the product solves a pain point and what it feels like to own a customized item. Use microcopy to explain personalization mechanics:
- How custom product options work
- Whether you offer line item properties for engraving
- Whether customers can choose variant options and editable product fields
Where should you place the launch date and the signup? Keep them near the top and pair them with your strongest benefit statement.
3. One Clear CTA That Stands Out and Reduces Friction
Use a single primary CTA above the fold and on repeat further down the page. Make the CTA copy explicit about the action and the customization benefit:
- Reserve My Custom Color
- Get Early Access to Personalized Orders
- Join Waitlist for Custom Engraving
Designing a Frictionless Call-to-Action
Design the button with large type, strong contrast, and enough white space so social share icons and extra links do not distract from it. Reduce friction by allowing visitors to complete personalization tasks during signup: add a dropdown for product customizer choices, a checkbox to request monogramming, or a short text field for engraving samples. Will you ask for only an email or capture preferences too? Balance simplicity with the data you need to personalize follow-ups.
4. Live Chat That Answers Questions and Captures Personalization Intent
- Add a live chat widget so visitors can ask questions about sizing, materials, or customization options in real time.
- Use proactive messages targeted at behavior. For example, prompt a chat when someone lingers near the product mockup or the customization options.
- Integrate chat with your Shopify backend or CRM to store answers as cart attributes or customer notes, and use that data to prefill product personalization settings later.
- Train agents or set up bot flows to capture personalization preferences, such as font choice, engraving text, or color choice, and then prompt the visitor to sign up or reserve a slot.
How will you route complex personalization requests from chat to your production team efficiently?
5. Social Sharing and Social Proof That Extend Reach
- Give visitors share buttons with prefilled text that highlights customization. For example, I’m backing a personalized sneaker drop.
- Display share counts, testimonials, and early press to provide social proof.
- If you have already received interest in custom product options, show the numbers: how many preorders, how many customizations were requested, or how many times a product was shared.
- Social proof calms doubt and increases signups, and shareable content that mentions personalization tends to travel farther among niche audiences.
Where will you feature testimonials about the personalization experience on the page for maximum trust?
6. Opt-in Form That Captures Email and Personalization Preferences
Keep the form short: name and email, plus one quick question that reveals personalization intent—for example, a dropdown for preferred product customizer choice or a checkbox for wanting engraving. Short forms convert better, but small fields that indicate intent let you segment subscribers and send tailored content. Use your email platform to trigger a prelaunch sequence that:
- Highlights how to use custom product options
- Shows work in progress
- Offers early access for people who want customization
Store the preferences as metafields or cart attributes in Shopify so you can honor them when you open checkout. Want higher signups? Offer an incentive in exchange for the extra field.
7. Countdown Timer That Creates Honest Urgency
Add a visible countdown to the launch date or to a limited window for custom slots.
Place it near the CTA and the signup form so urgency supports the action.
Choose a truthful model, either a fixed launch date or a limited quantity for personalized runs and update counts dynamically to avoid risking losing trust.
Tie the countdown to personalization offers. For example:
- Only 50 custom monograms available.
- Early access to the first 200 custom colorways.
Which positioning on the page gives the timer the most visibility without seeming pushy?
8. Incentives That Reward Early Commitment and Boost Conversions
- Offer discounts, free personalization, early access, or gifts for early subscribers.
- Make the reward relevant to customization: first 100 signups get free engraving, or early access includes complete control of variant options before public release.
- Use referral incentives to turn each subscriber into a small acquisition channel.
- Provide people with a unique link that rewards both the referrer and the new subscriber with extra perks tied to product personalization.
- Capture the incentive choice during signup and save it as a cart attribute so the checkout applies the correct discount or free option automatically.
Which incentive will move your audience most—a price cut, exclusive personalization, or VIP access to custom product settings?
Benefits of an Effective Shopify Coming Soon Page
A coming soon page does more than tell people you exist.
- Use it to announce a launch date, tease product features, and show a personalized hero image that hints at available custom options.
- Add a countdown timer, rotate teaser copy tied to different customer segments, and test headlines aimed at buyers who want customization like monograms or custom engravings.
- Direct traffic to social channels and referral links, enabling search engines and audiences to observe momentum as you adjust product templates and personalization settings.
Turn Interest into Customers: Building an Email List on Your Coming Soon Page
- Put an email form where it’s impossible to miss.
- Offer early access, pre-order slots, or exclusive discounts for subscribers.
- Capture names and ask one personalization question up front—such as monogram initials, preferred variant, or whether they want gift personalization—to start segmentation.
- Connect the form to your CRM and email platform, then feed those values into automated nurture sequences that highlight product personalization, custom product variants, and bespoke add-ons.
Collecting these custom attributes early lets you target messages that match customer intent.
Test Offers and Design with Real People: Getting Early Feedback
- Use the pre-launch phase to run A/B tests on headlines, imagery, and personalized product options.
- Track which custom fields or product options get selected most often.
- Invite a small group to preorder sample items with specific personalization settings to learn production constraints and estimate demand.
- Record sessions and heat maps on the coming soon page to identify where visitors pause or drop off.
- Then, iterate on the product customizer flow, upload file prompts, and implement the conditional logic you plan to roll out on the live site.
Talk with Visitors in Real Time: Use Live Chat to Capture Needs
Install a live chat widget that can ask targeted questions about personalization: would they add custom text, choose an image upload, or prefer dynamic pricing for extra options? Live chat surfaces concerns you might not anticipate and lets agents capture line item properties or cart notes directly. Link chat transcripts to orders and to your product personalization app so each request becomes an actionable custom attribute in the order workflow.
Must-Have Components for a High-Performing Coming Soon Page
- Headline that speaks to product personalization and benefit.
- Hero image or short video showing custom variants in use.
- Email capture with optional personalization fields.
- Countdown timer or preorder CTA for scarcity.
- Social proof, influencer badges, and trust signals.
- FAQ covering production times for custom engravings and upload file specs.
- Preview of personalization options: color swatches, monogram fields, file upload.
- Links to product templates, shipping info, and customer support channels.
- Analytics tags, Shopify metafields, and app integrations are already wired in, so you can measure interest in product options.
How to Add a Personalization Option on Shopify During Pre-Launch
Choose your method: use line item properties, Shopify metafields, or install a product customization app like:
- Product Personalizer
- Infinite Options
- Bold Product Options
Managing Custom Product Fields and Logic
For a quick setup, add a custom field to the product form using line item properties in your theme code, allowing buyers to enter text or upload a file. For advanced needs, install an app that supports conditional logic, dynamic pricing, and image upload. Map those custom fields to cart notes or order attributes, then test the checkout flow and the way custom attributes appear in the admin or fulfillment system.
Step-by-Step Quick Guide to Adding a Custom Field
- Add a custom input to the product template or a dedicated coming soon template.
- Capture the input as a line item property so it appears on the order
- If needed, install a product customizer app to enable variant personalization, file uploads, or pricing rules.
- Use metafields for structured product attributes that feed product templates and email tags.
- Test on desktop and mobile, and place a mock preorder to confirm the personalization data travels through to fulfillment.
Keep Fulfillment and Production Ready When You Offer Personalization
- Define options that match your production capacity: limited font choices, fixed placement for engravings, or preset color palettes.
- Use conditional logic in your product options so customers only see choices relevant to their selection.
- Export orders with custom attributes, or connect your personalization app to print-on-demand providers to automate fulfillment.
- Ask customers for required formats and provide clear upload guidelines so you reduce revision cycles and speed delivery.
Measure What Matters: Tracking Pre-Launch Metrics and Personalization Signals
- Track email signups, conversion rate on preorder CTAs, and engagement with personalization fields.
- Use Google Analytics and session recordings to spot drop-offs during the customization flow.
- Monitor which custom attributes generate the most preorders and which options drive abandoned carts.
- Tag events for file uploads, text entries, and conditional selections, allowing you to forecast inventory and set production timelines tied to popular personalized variants.
Turn Early Data into Better Product Pages and Checkout Flows
- Feed what you learn into product templates, set up default personalization options for the main store, and preconfigure metafields so Shopify themes render personalized previews.
- Use customer responses to refine pricing rules, create personalized product bundles, and plan email campaigns that promote specific customizations to the right segment.
- Ask a direct question on the coming soon page: which customization would make you buy faster, and let answers shape your feature rollout.
Start a FREE Trial and Generate 3 Product Pages with Our AI Page Builder Today
PagePilot is an AI page builder that creates product pages from a competitor or supplier URL. Paste a product link and the AI extracts layout, headlines, bullets, and element order to assemble a page optimized for conversions. You keep control: edit copy, swap sections, and add personalization fields. The builder focuses on a clean product page structure, persuasive product descriptions, and a visual hierarchy that guide a buyer to add to cart.
How PagePilot Uses Competitor and Supplier URLs to Create Pages
Paste any competitor or supplier URL, and PagePilot scans publicly:
- Visible copy
- Image types
- Page structure
The AI identifies product features, pricing cues, and angle choices so you can test different value propositions quickly. That same extraction speeds split testing between variants, headline changes, and product bundles, so you can iterate sample pages without rebuilding layouts from scratch.
Upgrade Product Visuals with AI Product Image Function
PagePilot’s AI product image tool enhances visuals, ensuring your store does not display the same photos as the supplier. It can remove backgrounds, generate lifestyle mockups, create consistent image sizes, and produce alternate angles for thumbnails. You can upload a base photo or let the AI enhance supplier images, then choose final assets for:
- Product gallery
- Social ads
How to Add a Personalization Option on Shopify with PagePilot
- Add personalization using PagePilot’s visual editor.
- After the AI creates the base product page, add input fields where customers enter custom text, choose monogram styles, or upload files.
- Select field type: text field for names, dropdown for font choices, checkbox for gift wrap, or file upload for logos.
- Map each field to cart attributes or line item properties so the personalization appears on the order and in fulfillment notes.
- Set price adjustments per option if engraving or custom printing carries an extra cost.
- Preview the product page, test the add to cart flow, and verify the order in Shopify admin.
Product Personalization Elements You Can Add with PagePilot
- Text input for names and messages
- Dropdowns for size, color, or engraving style
- Radio buttons or checkboxes for extras like gift wrap
- File upload for customer logos or artwork
- Quantity-controlled bundles and variant selectors
- Dynamic price adjustments tied to selected options
How to Add a Personalization Option on Shopify Without an App
If you prefer manual methods, you can add personalization by editing the product form in your theme. Add inputs named properties [Your Label] so Shopify stores them as line item properties. Example input name: properties[Engraving Text]. Those values appear on the cart, in the order summary, and in the line item when you view the order.Use these steps:
Go to Online Store > Themes > Edit code.
Find product-form.liquid or product-template.liquid.
Insert input fields inside the product form with names like properties [Custom Text].
Add minimal instructions so customers know format limits.
Optionally add JavaScript to validate or preview the personalization before adding to the cart.
Technical Methods and Integrations for Advanced Customization
- Line item properties capture free text and file uploads without creating new variants.
- Product variants remain the best choice for inventory-tracked options like size. Metafields let you store structured personalization rules or assets per product.
- Use Liquid to render personalization on the product page and in the admin.
- Use Ajax and cart.js for dynamic cart updates and client-side validation.
- For dynamic pricing, use Shopify Functions or the Storefront API to apply price changes based on selected options.
- If you need complex builders, integrate a product customizer app or a headless builder via the Shopify API.
Examples of Liquid Input for Line Item Properties
- Text input: <input name="properties[Engraving]" type="text">
- File upload usually requires a third party or app for safe handling and storage.
When to Use Apps Versus Manual Methods
Choose manual line item properties for simple text fields and single file uploads. Choose an app or PagePilot for complex rules, conditional options, image previews, or when you need built-in dynamic pricing, SKU mapping, or production-ready artwork files. Apps like product options or customizer tools add UI polish and reduce development time.
How to Handle Fulfillment and Order Flow with Personalized Items
Ensure personalization fields appear in the Shopify order and packing slips. Map properties to fulfillment instructions and include the customer-supplied file in your production folder. If you use a third-party fulfillment partner, connect via API or use a manual export of order line item properties so the production team receives the engravings, monograms, or uploaded artwork.
Optimize UX for Personalization on Product Pages
Label fields clearly, set character limits, provide font and placement previews, and show a live mockup. Use conditional fields so customers see only relevant options. Validate inputs client-side to reduce mistakes. Show price changes immediately if personalization adds cost.
Testing Personalization Options and Conversion Copy
Run A/B tests on where input fields appear, how many options you offer, and the wording of field labels. Test headline angles, social proof placements, and image treatments that highlight custom engraving or monogram examples. PagePilot speeds this up by cloning pages and swapping only the personalization modules.
Workflow to Test Products and Angles Faster with PagePilot
Paste a competitor or supplier URL.
Let the AI generate a draft product page.
Add personalization fields, set price rules, and attach image assets.
Preview and QA the add-to-cart flow and order capture.
Launch and run A/B tests on copy, layout, and personalization complexity.
Start Your Free Trial: Create 3 Product Pages Free
Try PagePilot free and generate three product pages without a credit card. Build pages that include personalized options like custom engraving fields, text inputs, dropdowns, and file uploads. Test different images and price adjustments, and export pages directly to your Shopify store for instant testing. Want an example page built from one of your competitor URLs right now?